Hello & welcome to my blog,
My name is Alison & I am an independent Stampin' Up® demonstrator in Melbourne, Australia. I love creating cards & gifts for my loved ones & this blog will show you how to create something special for those you love. I blog twice a week, once on a Sunday where I mainly showcase a stamp set or dies & sometimes special DSP. My second blog is mid week on a Wednesday where I look at techniques, colour challenges, card sketches, fun folds, tools & equipment & ways to make or improve your projects. That's what this blog is about.
My creation this week is called a cigar box. It's a hinged box with a recessed centre that is perfect for small gifts such as chocolates or hand creams.
Here's the step by step process I took to create my box.
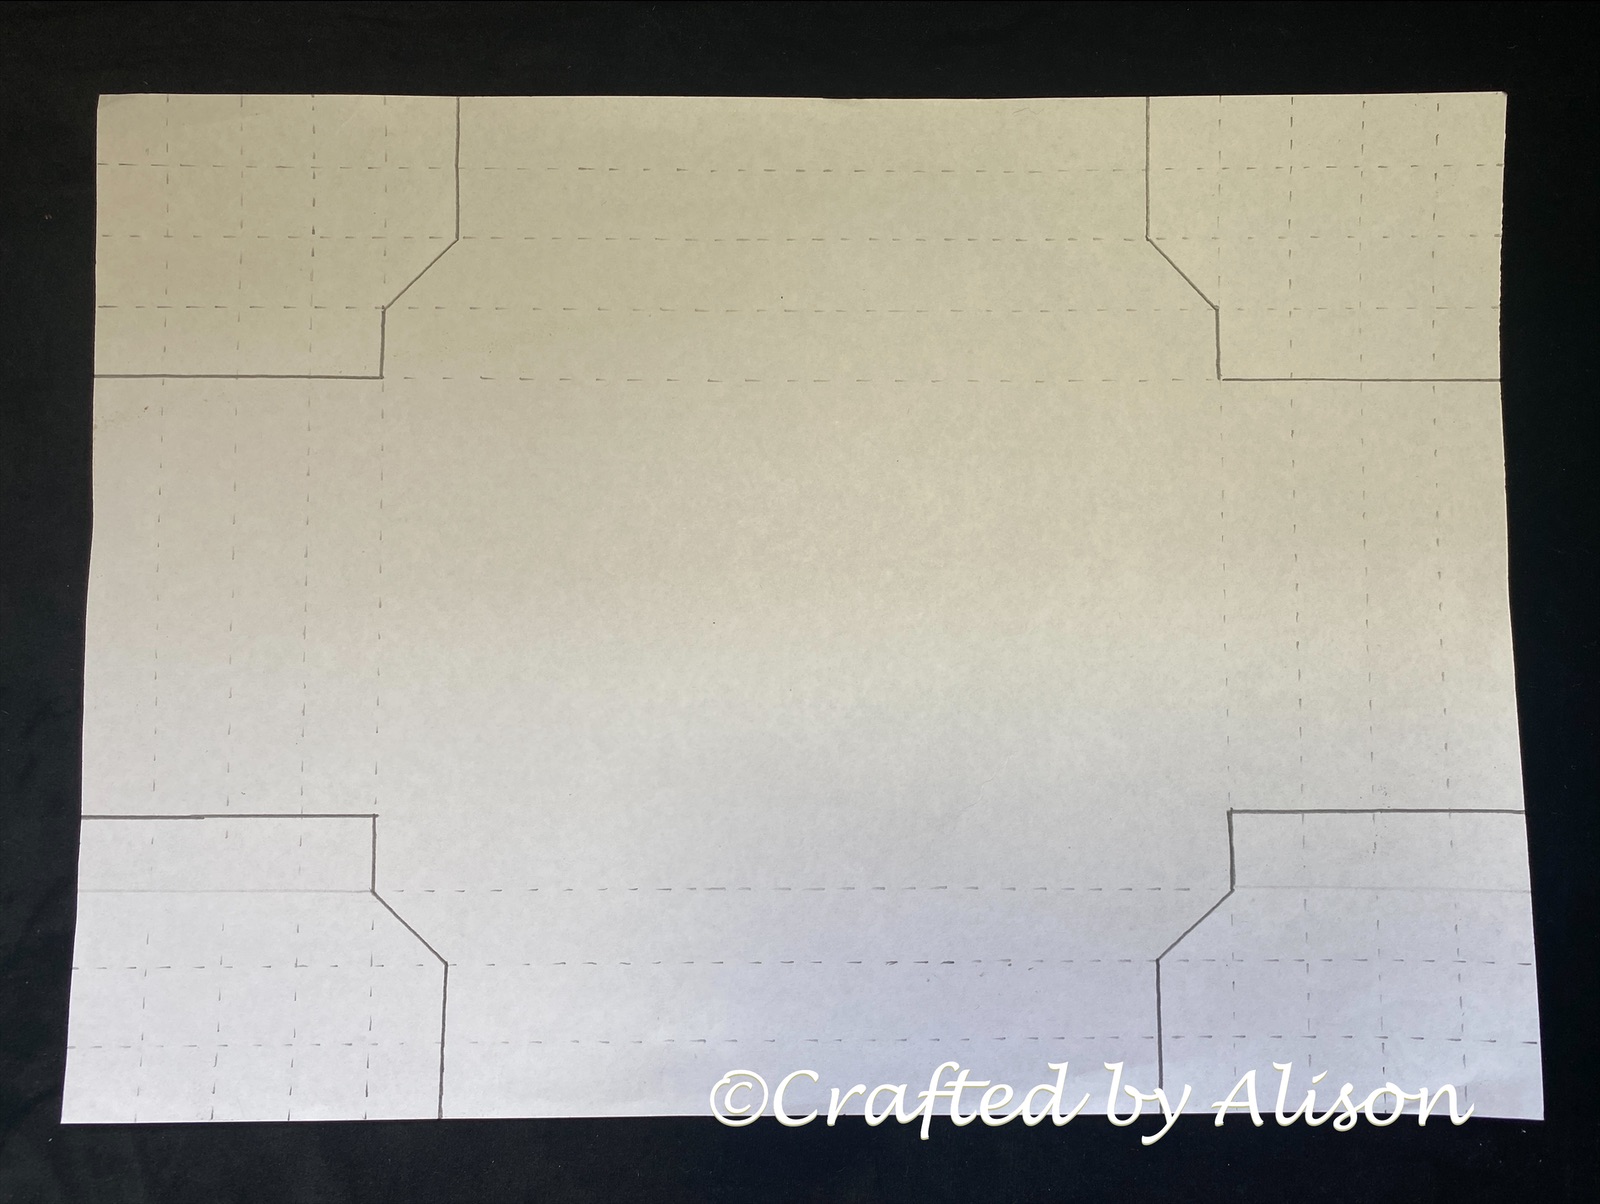
The template shows how to create your own. The measurements are 29.5x20.8cm
Score on both long sides at 28, 26.5, 25 & 23.5.
Score on both short sides at 19.5, 18, 16.5 & 15.
Cut along the solid lines as shown above.
Fold & burnish all score lines. Turn over & burnish again to ensure all the fibres have been broken properly.
This is how your base should look once scored & cut.
Fold the small sides in, applying glue to the underside then press down. Using a pencil or scoring tool inside can help to ensure the glue sets well.
Repeat the same process with the larger sides. Adding a little dot of glue to the corners of the small sides will help to keep the mitred corner down.
This is the template for the hinged lid of the box.
Cardstock measurement is 20.8 x 12.2.
Fold & burnish all score lines as for the base & cut the solid lines.
Here is the finished lid with score lines.....
...with the solid lines cut....
...and with the spaces cut out.
Add a finger hole with whatever punch you have handy.
Apply glue to the tabs at the front of the lid & adhere.
Apply glue to the back strip & adhere to the back of the base.
Here is the completed box open...
...and closed.
The finished box measures 17.5 x 9 x 1.5cm. Cute right?
That's it for this week. I hope you enjoyed this quick & easy way to create a cute shadow box or cigar box. They really are very versatile.
My next blog is on Sunday & features a beautiful set called Sweet Citrus. It's currently in the January to April 2023 mini catalogue but the good news is that it's carrying over to the new Annual catalogue! Yay. It has a gorgeous stamp set, matching dies & a hybrid embossing folder which allows you to emboss & cut at the same time. I'll be using them to finish off todays box as well as making some other projects & I can't wait to show you what I've created with them! In next week's Mid Week blog I will be showing you a technique called distressed watercolour. I hope you can join me again for both of those.
Thanks so much for stopping by. Til next time, take care & keep creating. XX Alison


Comments
Post a Comment