Mid Week Blog #60 - Gift wrapping & giving options

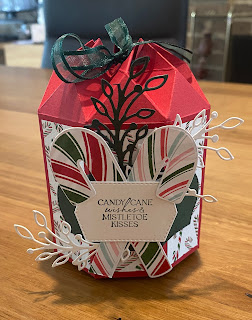
Hello & welcome to my blog, My name is Alison & I am an independent Stampin' Up® demonstrator in Melbourne, Australia. I love creating cards & gifts for my loved ones & this blog will show you how to create something special for those you love. Today's blog shows you how to create bonbons for gift giving. I had a good play around with sizes & materials to see what works & what doesn't. I hope you enjoy it! Here are 3 different sizes I created for this blog. The top one is an eight sided design. The centre one is six sided. The smaller bottom one is 5 sided. The following pictures show the steps I took to create the centre bonbon. To begin I used a regular scoreboard. With a piece of DSP measuring 17.5 x 30.5cm I scored the long side at 5cm & 25.5cm. On the short side I scored at 2.5cm intervals for the whole length. The following pics show the measurements as the DSP doesn't show the scorelines clearly. Next I used an Envelope Punc...