Posts

Showing posts from October, 2021

Tidings & Trimmings

Image
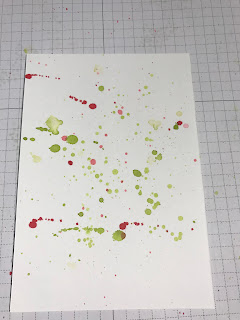
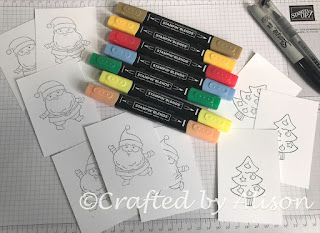
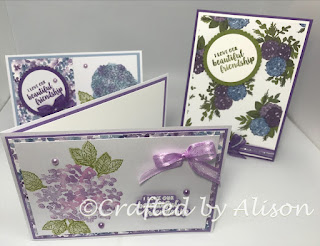
 Hello & welcome to my blog. Another busy week with work but WOOHOO! we're out of lockdown! Able to catch up with family & friends, going out for a sit down coffee or meal, so many positives & everyday events that you take for granted until you don't have them. Happy to have my little luxuries back. 😍 The cards I have for you today are made with the Tidings & Trimmings Stamp set & the Christmas Trimmings dies. I also incorporated my Mid Week blog technique, Splatter backgrounds, into the 3 cards. I have snuck in a card made with the Sweet Little Stockings stamp set as well as I used the splatter DSP for it too. Here they are........ The first card was made with a Granny Apple Green base. I cut a strip of the splattered DSP & matted it on some Poppy Parade. I stamped some Poppy Parade stars & the sentiment straight onto the DSP with some Evening Evergreen ink. I added some Gold Specialty paper to the card front before adding some stamped & die cu

Mid Week Blog series #3

Image
 Hello & welcome to this week's mid week blog. Today we are looking at how to achieve a different effect on a background. A super simple way to add a little detail or contrast is by adding a splatter pattern with your inks.  This simple splatter pattern was made using only 2 ink pads, a aqua painter & some cardstock. Here are a few pics of the process I went through to achieve this look. Please excuse that the photos are not very professional. I'm only using my iPhone at the moment. 😛 Pic 1 - I started with the Poppy Parade pad & pressed down on the cover before opening. Pic 2 - This left some ink on the cover when I opened it. Add drops of water from the aqua painter then mix the ink & load up the brush. Pic 3 - By tapping the aqua painter or flicking it the ink is released in small splatters. Next I added some Granny Apple Green ink. I used the same steps as for the Poppy Parade. All the patterns will be totally unique as there is no control over where the in

Plentiful plants

Image
 Hello & welcome to my blog! There will be many happy parents in Melbourne at the moment as many of the students returned to school, even if only part time. I'm back full time & the children, whilst out of their usual school routines, are happy to see their friends & use our new playground which was installed at the beginning of lockdown. Poor cherubs didn't get to use it but now they are making good use of it. Full time at work takes a little adjustment but I'm lucky that when I need to have a little 'me' time I can immerse myself in creating.  And that's exactly what I did for this week's creations. My focus stamp set is Plentiful Plants which co-ordinates beautifully with the Perfect Plants dies & Bloom Where You're Planted DSP. It is such a gorgeous suite but each part of it can be purchased separately. I loved immersing in nature for these creations. This is a close up of the different types of plants in the stamp set. Here are some

Mid Week Blog series. #2 Triple stamping technique

Image
 Hello & welcome to this week's mid-week blog, Today's technique I call Triple Stamping. Although you only stamp once you end up with 3 layers of DSP.  Here's how I achieved the layers. On  a piece of Basic White I stamped the largest plant image in Garden Green. Next I stamped the smaller plant in Pear Pizzazz. I then added the String of Pearls plant in Granny Apple Green. Lastly, I stamped a few leafy accents around the edges of the cardstock with Mossy Meadow. The next step was to die cut the stamped card stock to make 3 layers of the DSP. I used the Stitched Rectangles dies to achieve this. Using Garden Green cardstock I die cut layers slightly larger than the stamped layers. I adhered each image to it's slightly larger cardstock layer then adhered them in ascending sizes until it was all one piece. This was adhered to an Evening Evergreen card base. I stamped the Happy Birthday sentiment in Evening Evergreen & matted it on a Pear Pizzazz strip. The final to

Be Jolly with Holly Jolly!

Image
 Hello & welcome to this weeks blog, It's great to have you visit. I have a super collection of creations for you that I made using 2 stamp sets  from the July to December 2021 Mini Catalogue - Be Jolly & Holly Jolly wishes. I started with some relaxing colouring then used a couple of the images for 2 cards. I still have lots left to make into cards though! The collection of items I made could have gone on and on as there are so many different combinations you can make with the 2 stamp sets but I limited myself to a few cards, a gift card holder & a bottle tag. To start with I made 2 cards using traditional greens, red & white but I wanted to give it a slight Aussie twist so I used the Forever Ferns stamp set as it has some lovely gum leaves/nuts in it. I also added a small strip of Forever Greenery DSP to add some ferns. I embossed the white cardstock matt with the Wintry 3D embossing folder & die cut the sentiments using the Stitched So Sweetly & (retired)

Mid week blog series - #1 Corner fold card technique

Image
 Hello & welcome to my new mid week blog series. Each week I will show you a different technique in either stamping, colouring or designing a card. For my first in this series I have decided to show you how to create a card with a built in pocket for gift cards! It's super easy but saves you the job of finding a way of enclosing a gift card or wrapping it separately. Here's a pic of a finished example and the inside with a gift card:   To make one of your own you will need : Main cardstock 21 x 14.8cm 1 piece of white cardstock for the inside (right panel) 14.3 x 10cm 1 piece of white cardstock for the inside (left panel) 13.8 x 9.5cm Contrast cardstock for matting the image 9.5 x 7.5cm White cardstock for stamping image 8.5 x 6.5cm  2 pieces of DSP 14.3 x 10cm White cardstock scrap for stamping the sentiment. Contrast cardstock for sentiment matting - dependant on your sentiment, this card used 3 x 10cm before trimming the edges. Dimensionals & glues Trimmer Embellishm

Textures & Frames

Image
 Hello again & welcome to this week's blog. I hope you had time to check out my extra blog on Wednesday where I featured the cards I made on World Card Making Day last Saturday? I hope you liked them. I have had so much fun creating with the Textures & Frames stamp set this week. There are just so many different ways you can use this set, it really was a great freebie from Sale-A-Bration. I hope you were able to grab one when they were available. I wanted to keep these cards simple so I decided to use only 4 different stamps for the images and this is how they turned out...... I started my collection with (of course) a Christmas theme. I have seen a number of different designs using this set from other demonstrators but I wanted to give it my own spin.  The Baubles just leapt out at me when I saw the solid circles & I added the stripes as decoration. The cap of the ornament is made with the inkwell stamp from the Beautiful World stamp set & the sentiment comes from

World Card Making Day 2021 Special blog post

Image
 Hello & welcome to a special mid-week edition of my blog! Thanks so much for dropping by, in this edition I have all the cards I made last week to celebrate World Card Making Day 2021. I hope you like them as much as I enjoyed creating them. As they were made to celebrate card making I wanted to make some to send to some of my special girlfriends to let them know I was thinking of them. Here are the gorgeous Hydrangea cards I created. Aren't they gorgeous! I have always loved how beautiful Hydrangeas are as I remember Mum growing them when I was a child. When Stampin' Up brought out the Hydrangea Haven stamp set, Hydrangea dies & Hydrangea Hills DSP I had to get them & even though I've used them before I still love how beautiful the stamps & papers are. I used two of the Hydrangea Hills DSP prints teamed with Gorgeous Grape, Highland Heather & Seaside Spray (retired) cardstock for card bases & matting. I added a splash of Old Olive for the centre ca