Hello & welcome to my blog,
My name is Alison & I am an independent Stampin' Up® demonstrator in Melbourne, Australia. I love creating cards & gifts for my loved ones & this blog will show you how to create something special for those you love. Today's blog shows you how to create Octagonal Boxes in various sizes for gift giving. These boxes look gorgeous & impressive but are quite easy to make. I hope you enjoy what I have for you this week.
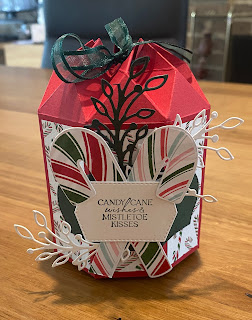
How gorgeous does this look? I created this with some ladies from a card making group that I attend each month. We all started with the same design but 'made it our own' by changing the score lines or using a larger piece of cardstock. Here are 3 that were made by myself & 2 other ladies.
As you can see, they're all lovely & very different. Once you know the basics of this design you can create all sorts of gift boxes for Christmas, birthdays, anniversaries, you name it!
I first saw this on Rachel Tessman's blog, Stamp Your Art Out & knew that I had to CASE it. Rachel has a great video on YouTube also that clearly takes you step by step through the process. Here are the basics so that you can get started on creating your own boxes.
All of the measurements, scoring & cutting lines are on this pic.
Scoring & cutting:
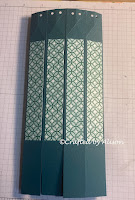
Once you've cut and scored the box itself, you need to cut 8 pieces of DSP slightly smaller that the large centre rectangles. Mine measured 12.6 x 2.1cm. Glue these down before you start assembling the box.
Preparing the diamond top
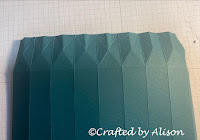
The score lines at the top that create the beautiful diamond cut effect are simply two diagonal score lines from the top of the card to the first horizontal score line then one from the top of the cardstock to the centre of the cross.
Gently pinch each of these score lines to help with folding later.
Once they are pinched, take a small hole punch & punch through two layers (the pinched layers). 8 punches will give you 16 holes. Punching them together means that when you are threading the ribbon later the holes will line up better & make the threading quicker & easier. You will see that the diamond is already starting to take shape.
Glueing & assembling
Now for the glueing steps. Apply adhesive to the right hand side of the box which measures 1.5cm. Fold the box in half so that the glued area is in the centre & the other side folds over it. This way is easier for lining up straight edges.
With the seam face down, apply glue to the 4 bottom flaps that are face up.
Open up the box again and glue 2 opposite pieces together. Now glue 2 more opposite pieces together to create a cross pattern. Continue with opposite pieces till all 4 pairs are glued.
I added a diecut circle at the base & inside to leave a neat finish.
If you choose to do this also, pop a bottle of glue or something similar while the glue dries to ensure a good seal.
Creating the diamond top fold
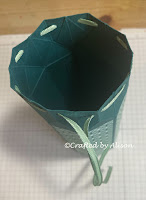
Start in the centre of the box. Hold the pinch lines together & align the two punched holes, thread the ribbon through all 8 punched pieces, ending at the front again.
Carefully pull on both ends of the ribbon like a drawstring & the diamond pattern will pop out. If it is threaded incorrectly you will end up with just a valley/mountain fold. Which is fine if you want it but I love the diamond pattern so took the time to rethread it until I got this beautiful look.
These boxes can be changed to suit the size of the gift. Alter the width of the panels or the depth of the horizontal score lines. Play around with this design for whatever gift you want. The box on the left was left plain & will have a matching card made for it. I chose to decorate the box on the right for Christmas with embellishments & a sentiment & this can be given without a card if you wish.
I hope you enjoyed this blog. I'd love to see what you come up with if you try it so feel free to post some pics on my FaceBook page at craftedbyalison.
That's all I have for you for this post. Thanks for stopping by. My next blog will be on Sunday & features some more creations using the Merriest Moments collection. Next week's Mid Week blog looks at more gift wrapping & giving options. I hope you can join me for both of those.
Til next time, take care & keep creating. XX Alison


Comments
Post a Comment