3D creations - gift boxes
Hello & welcome to my blog,
My name is Alison & I am an independent Stampin' Up® demonstrator in Melbourne, Australia. I love creating cards & gifts for my loved ones & this blog will show you how to create something special for those you love. I blog twice a week, once on a Sunday where I mainly showcase a stamp set or dies, embossing folders, projects & sometimes special DSP.
This week I have a 3D creation for you. Gift bags are wonderful for enclosing presents but sometimes you need a box to hold your items. This week I show you how to create 2 different sized boxes using the same method but different measurements. Both are very easy to make & once you start creating them you will find that a measurement tweak is all you need to make lots of different sized boxes to suit your needs.
This box will hold 4 or 5 cards depending on the size of the card. If there are lots of dimensionals then you would fit less. I they are simple cards of one layer then you would easily fit 5 or possibly 6 cards.
Now I'll walk you through how I made them.
I chose Fresh Freesia & Basic Black along with Delightfully Ecclectic DSP for the first box. It was created using metric measurements.
To achieve a box that measures 17cm x 12cm you need to start with cardstock for the base measuring 21cm x 16cm, scoring 2cm on each side. Fold & burnish.
For the lid you will need a piece of cardstock measuring 20.4cm x 15.4cm. This will allow plenty of room for the lid to be easily removed. If you would like a more snug fit then cut the cardstock 1 to 2cm smaller on both sides. Score 1.5cm on each side. Fold & burnish.
On the long sides, cut up along the score lines & mitre them slightly.
To decorate the lid I cut a piece of Basic Black 17cm x 12cm & the DSP 16.6cm x 11.6cm.
I adhered the mattes to the top of the lid before glueing so that I could apply some pressure without squashing it. Apply adhesive to the mitred sections & hold in place until set.
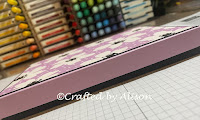
Done! The lid will sit easily over the base & can be decorated as desired. A sentiment tag, stamped images, foilage, whatever you need or want to make it suitable for the occasion. To hold the box closed you simply need to wrap some ribbon around the box & tie a bow. Here are views of the assembled box. Mine is not decorated as I will finish it as I need it.
NEWS & REMINDERS:
- Just a reminder that Stampin' Up® launched their new Annual Catalogue in May & there are lots of lovely things to get your creative juices flowing. If you would like one then send me a message at craftedbyalison on Facebook or email me at craftedbyalison@gmail.com.
- As mentioned in previous blogs, Stampin' Up® have announced that they have had a 'colour refresh' which includes not only the new In Colours range but a change up of the regular colours in the range. There are also some old, previously retired colours returning so if you held on to a favourite colour but are running low, here's your chance to grab some more.
- Don't forget the Online Exclusive products with new products added and available now! Check out my online shop here. There have been more products introduced to the online store which means that some products may be gone. We haven't been advised of retiring products so if you see something you like in the online store, get in quick in case it goes!
- Stampin' Up® are currently running a 'Bonus Days' promotion from 6th to 31st July where you can earn free money to spend in August when you spend a minimum of $90. For full details click here to see the flyer. It's a great time to buy with new items in the Online Exclusives section plus all the goodies from the current catalogue!
If you would like to purchase any of my creations that I feature in my blogs they can be found in my FaceBook shop at craftedbyalison or you can order something unique.
- None used this week
- Basic White Thick cardstock
- Basic White cardstock
- Basic Black cardstock
- Fresh Freesia cardstock
- Garden Green cardstock
- Delightfully Eclectic DSP
- None used this week


Comments
Post a Comment