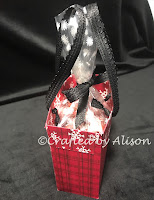
Mid Week Blog Series #11 - Make your own gift bags.
Hello and welcome to my mid week blog,
These mid week blogs are designed to be shorter than my Sunday blogs so that I can share techniques, card design or other tips and tricks with you. Today I will show you how to create your own gift bags. There's still a little time to make them for last minute Christmas presents but they also come in very handy during the year for birthdays & special occasions.
Here are 3 bags I made earlier in the year so this is a refresher or for those who are visiting for the first time it's a newbie! LOL
The first two were made from the one sheet of Peaceful Prints DSP but have been reversed to give different finishes.
Here's a pic of the cutting & scoring instructions:
This template was found on Connie Stewart's Simply Simple stampin blog & is the one I used to make the 2 bags.
Fold & burnish all of the score lines then trim the small rectangles at both ends of the 1/2" fold & mitre off the edges.
Now, using the 1 1/4" edge, snip up each score line to meet the next score line. Mitre the edges of each piece. This will form the base of the bag.
Next, flip the DSP over & fold & burnish the 1" section. This will form the flap at the top of the bag.
To assemble, use glue or tape along the 1/2" edge & adhere the other side of the DSP over onto the smaller piece. Do the same with the base pieces making sure that you only glue the areas that will be touching as they don't overlap completely.
If you would like to reinforce the base you can add a piece of cardstock measuring 4" x 1 3/4" to the inside & use some more glue to keep it in place. I used a bone folder to push down on the base to make sure the glue adhered well.
If you would prefer some handles, punch some holes through both layers of the DSP on both sides of the bag & thread some ribbon or twine through.
These were the quickest to make and fit a smaller gift as shown in the pics. Perfect for a work gift or teacher thank you or even a gift card. I changed up the colours of the ribbon to show that these bags can be for either gender. They have a reinforced base to give a little more strength. Super cute I think!
The larger bag is around 24cm (9 1/2") tall & was quick & easy to make following a visit to some youtube videos then tweaking it to fit what I wanted. It's made from one of the pieces of Peaceful Prints DSP plus a little bit of Sahara Sand cardstock die cut using the Stitched Rectangle dies & some pearl brads I had left over from a long time ago. It was scored at 3", 4", 5", 8", 9" & 10" along the 11" edge then at 1" along the 7" edge. It follows the same principle of assembly as the two smaller bags above. The top of the bag is glued at the back of the tag & reinforced with two brads & the front pearls have some cute Black & White bakers twine from the Playful Pets suite. This would be great for some treats or a small bottle of shower gel or even a lovely hand cream.
That's it for the gift bag ideas. If you have something specific in mind size wise there are many, many youtube & Pinterest pics & videos online. Browse until you find what you want.
Thanks for popping in today. I hope you enjoyed this tutorial. I hope you can come back next week when I will show you some projects I made using our cute little finger tip Sponge Daubers.
Have a wonderful Christmas with those you love & stay safe. Hope you get some goodies at Christmas for your crafting! Bye for now, Alison. XX


Comments
Post a Comment