Mid Week blog #19 - Treat boxes
Hello and welcome to my mid week blog,
These mid week blogs are designed to be shorter than my Sunday blogs so that I can share techniques, card design or other tips and tricks with you. This week I will be showing you how to create a cute little treat box. I got inspiration for this box from Pinterest when I checked out a post by Buckey Inklings. So that you can easily create one of your own I've taken step by step photos of the process I worked through when making my box.
 |
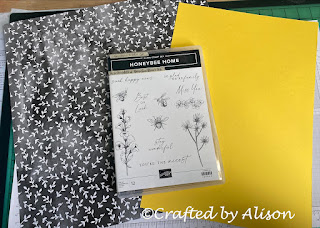
| I started with some Beautifully Penned DSP, Daffodil Delight cardstock & the Honeybee Home stamp set. |
 |
| Both of these pieces were cut to 18 x 15cm. |
 |
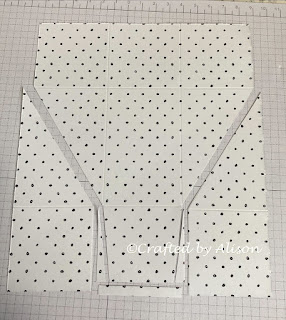
| They were both scored 5cm in from all 4 sides. A line was then drawn from the bottom 2nd score line to the top outside score line. |
 |
| Cut as pictured. |
 |
| This is the side that will be showing. |
 |
| Glue the end with 3 tabs as shown. |
 |
| Repeat the cutting with the cardstock (as shown) for the bottom of the box. |
 |
| Glue the ends with the shorter tabs. |
 |
| Glue the longer tabs but leave the final piece unglued. This will have the hinged lid glued inside. |
 |
| Placing the hinged lid on the bottom, glue the tab to the base then close the last cardstock tab & glue down. |
This little box is large enough for an Easter egg. I used a Kinder Surprise & it fitted beautifully. You could use it for mini eggs, candy eggs, some Ferrero Roche or similar treats.
I hope you enjoyed my creation & give this a go yourself. If you do, I would love to see your pics on my Facebook page - Craftedbyalison.
So that's it for the tutorial this week. I hope you can back for next weeks mid week post which will feature another Card Sketch and my regular Sunday post as I will be using the new Gumball stamp set & matching dies. Take care until next time & keep creating! XX Alison


Comments
Post a Comment