Mid Week blog #39. Fun fold. Double opening flaps.

 Hello & welcome to my Mid Week blog,

I am an independant Stampin' Up® demonstrator with a passion for creating. I have a regular weekly blog on a Sunday that explores different stamp sets, die sets or products sold by Stampin' Up® and my Mid Week blog explores tips, techniques, card sketches, colour challenges & lots of other ideas to help you make the most of your crafting time. There are ideas for 'just starting out' crafters, 'in-betweeners' and more avid crafters. 

Today's post features a cute fun fold with double opening flaps. It's quite an easy card to make but I added a couple of changes to mine as I went to make it work better.

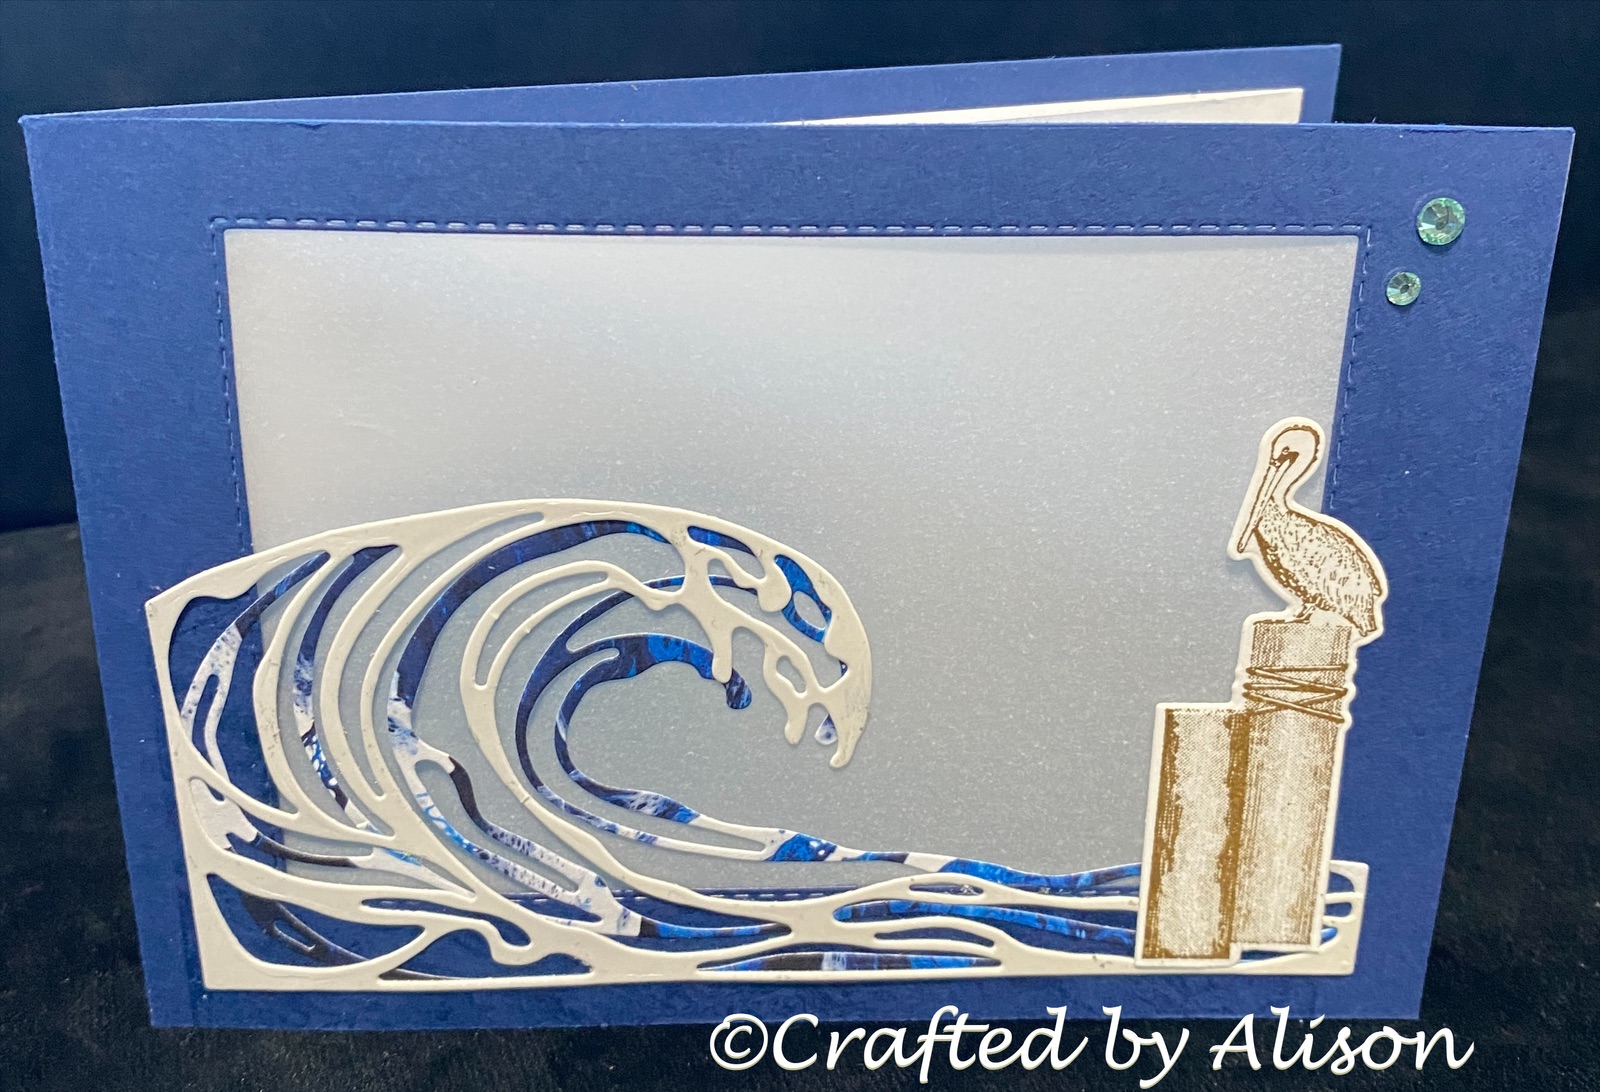
This is the finished card.....

and here are the steps I used when making the card...

I started with a half sheet of Night of Navy cardstock cut down in the portrait position & scored in half.

For the inside of the card I cut a piece of Basic White cardstock 1cm smaller on both sides for the inside fold of the card. 

 I cut a 7 x 14cm piece of the stunning Waves of the Ocean DSP and Mother of Pearl specialty paper.

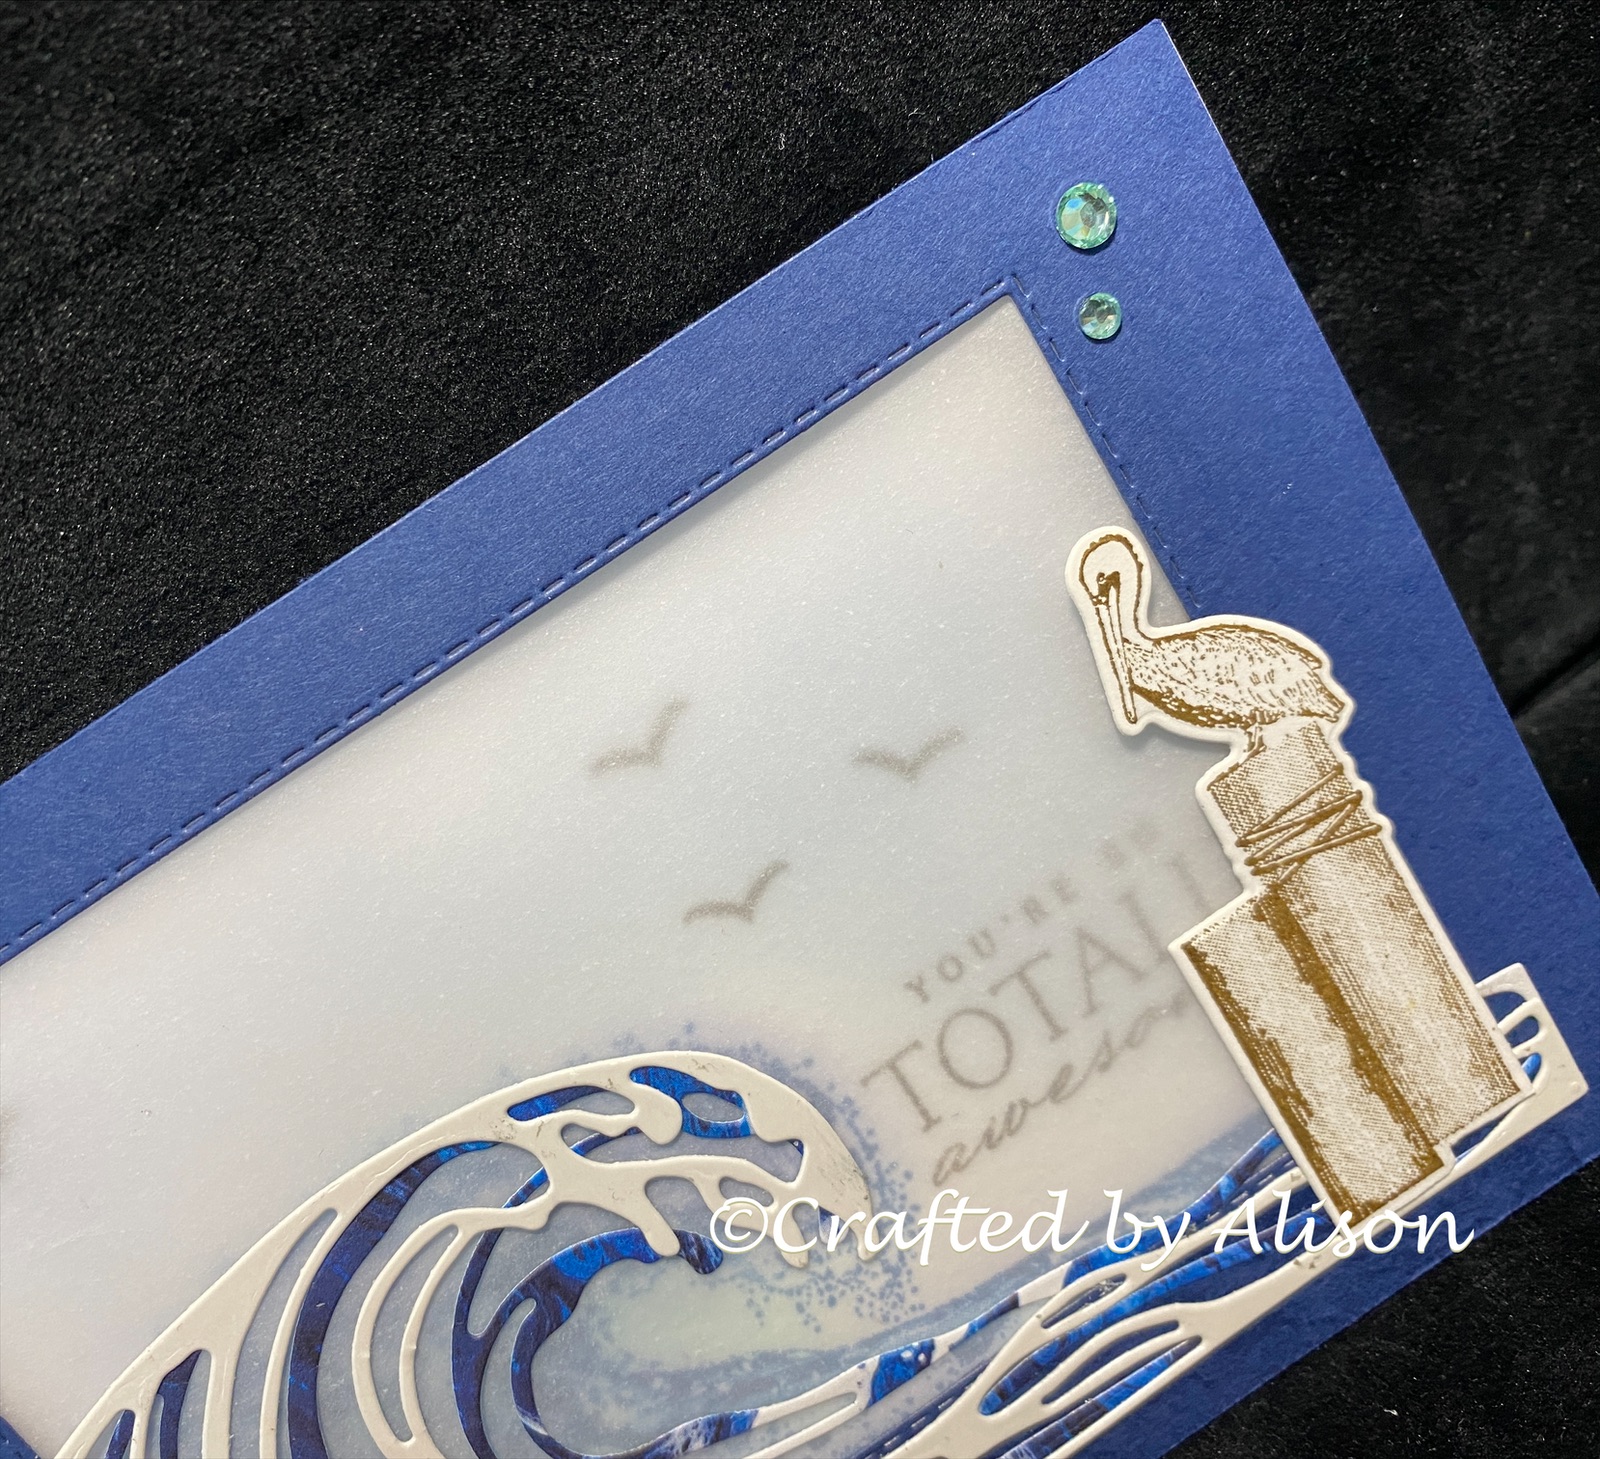
To create an opaque window for the front of the card I cut a 10.5 x 14.8 piece of vellum & trimmed just a tad off to ensure that the card would fold with it adhered.

I used the second largest rectangle from the Stitched Rectangles dies to cut out a window panel from the front of the card. Using the large wave stamp & Pacific Point ink I stamped the inside fold then the front of the card below the window.

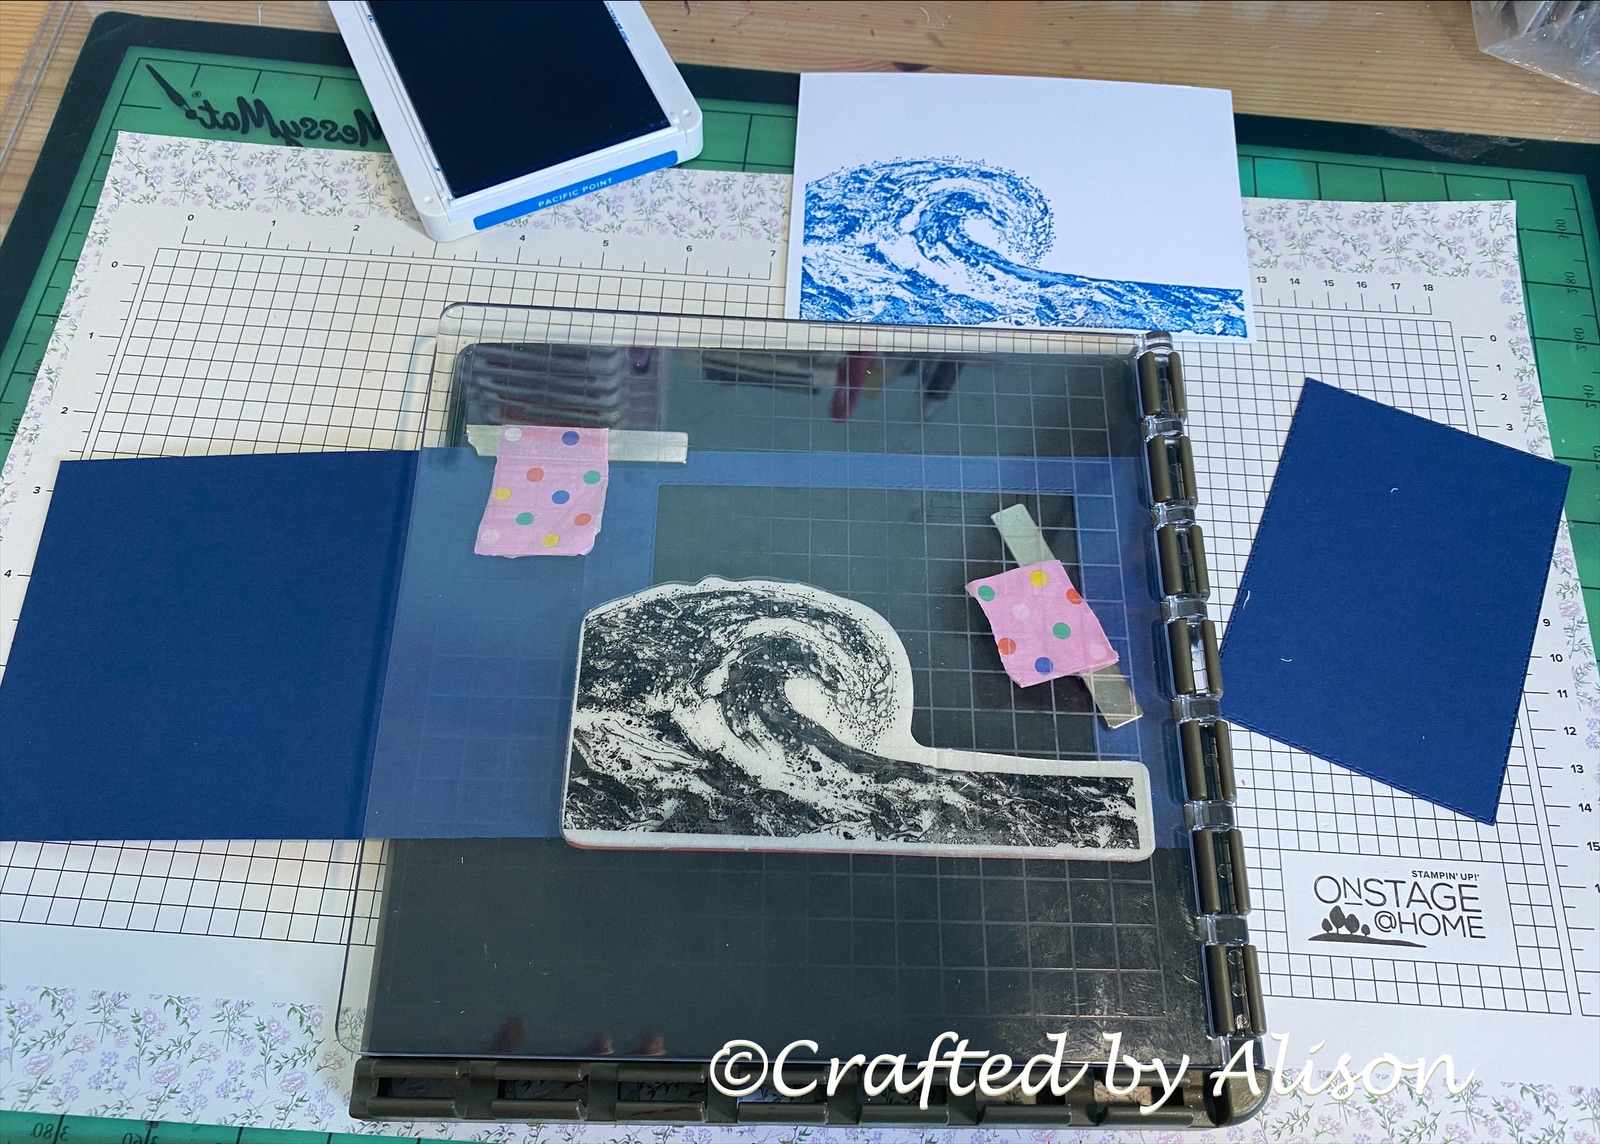
The next step was to run the DSP & Mother of Pearl paper through the diecut machine using the wave die.

I adhered, carefully, the waves to the front of the card, slightly over the stamped image. A stamped & diecut pelican in Soft Suede was added to the right of the window. As it would be seen through the window when open I stamped a second image directly onto an acrylic stamping block & then onto the back of the pelican image. This meant that when the card is opened you will see the same image in reverse rather than the cutout shape. This image was actually added after the card was completed as I thought it needed something else on the front.

To add to the stamped waves I used a blending brush with Night of Navy & Pacific Point to add depth to the wave & a sky scene behind it. The sentiment & some birds were added using Soft Suede.


I used the same technique for the inside of the second fold & added a pelican & some flying birds. To hide the small glue spots that showed when the vellum was adhered, I cut a frame using the largest Stitched Rectangle & it perfectly hid the glue & framed the reverse of the front scene.


So that was how I came to have the original finished card but even after adding a few Holiday Rhinestone gems I thought it needed a little extra. 


Hence the addition of the pelican & the totally finished card! 😁


As you can see in the last photo, adding the vellum allows you to see that there is stamping inside without it being the main feature. I love how this turned out & can visualise using this design to create a window full of flowers or a 3D scene. 

So that's it for another Mid Week blog. I hope you've enjoyed seeing how easy it is to create something special by using a fun fold. If you decide to create a card using this fold I would love to see it so please feel free to post it on my FaceBook page at craftedbyalison.

On Sunday I am featuring more creations from the Waves of Inspiration stamp set & co-ordinating Wave dies. Next week's Mid Week blog shows you how to create a simple card or step it up. I hope you can join me for both of them. Til next time, take care & keep creating! XX Alison


Comments

Popular posts

Mid week blog #99 - Square tri-fold fun fold

New creations with He's All That

Calendars & Christmas cards

3D creations - gift boxes

Tic Tac Toe challenge #174