Hello & welcome to my Mid Week blog,
I am an independant Stampin' Up® demonstrator with a passion for creating. I have a regular weekly blog on a Sunday that explores different stamp sets, die sets or products sold by Stampin' Up® and my Mid Week blog explores tips, techniques, card sketches, colour challenges & lots of other ideas to help you make the most of your crafting time. There are ideas for 'just starting out' crafters, 'in-betweeners' and more avid crafters.
In today's blog I will show you a really quick, effective way to create interest on a card using just alcohol makers.
During July Stampin' Up® held a creativity event. One of the cards we made used alcohol markers to create a really quick & easy background for a card. This got me thinking of how I could create other backgrounds for different types of cards, so I got out my alcohol markers & here's what I came up with.....

I have to admit that once I got started colouring I went a little bit crazy but on the up side, I now have lots of new creations to play with! Now I'll share how I made each one.
This first one was simply made by brushing the paint brush end of Just Jade & Pool Party blends across some Basic White cardstock from left to right & back. Then, using Evening Evergreen ink & Artfully Layered stamps I stamped the large fern image straight over the top. This is now ready for a card front when needed.
For the next image I used a precut Basic White frame to colour on. I started with one of the Natural tones skin coloured blends that Stampin' Up® recently launched. There are 5 sets all together but I am collecting them one set at a time. They don't have named colours but instead have been given numbers. The one I used is SU800 along with the Seaside Spray blends. This created the sand, water & sky background I wanted. Using Memento Tuxedo black I then stamped a Crane & some reeds from the Crane of Fortune stamp set. That's it for another one.
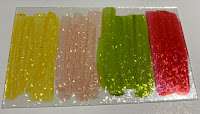
Having used muted colours for the first two backgrounds, I went all out with some rainbow colours for the third piece. There are 8 colours altogether creating this piece - Pool Party, Poppy Parade, Highland Heather, Granny Apple Green, Calypso Coral, Daffodil Delight, Seaside Spray & Polished Pink.
I then used the finished piece to diecut some pretty flowers from the Good Fortune dies as shown above. Love it!
Using different cardstock was on my list of 'things to try' with the blends so I chose a small scrap of Mother of Pearl specialty paper to experiment on. I kept some of the colours from the rainbow piece - Poppy Parade, Granny Apple Green, Calypso Coral & Daffodil Delight. This paper takes a little longer to dry so you need to be patient if trying it yourself. Not 100% sure what this will look like when I finish with it but in my mind I'm thinking of a diecut sentiment in black across it. I'll share the final result in a future post.
Next up was using some of the background pieces underneath the new Split Card Texture dies.
I chose Granny Apple Green, Calypso Coral, Daffodil Delight & Pale Papaya for the next piece. After colouring the Basic White in alternating layers I used the pretty floral type of die to cut out a delicate pattern. I then attached it to another piece of Basic White to highlight the pattern. This left a strip of white along the side. To create a little interest I wrapped some Soft Sea Foam seam binding ribbon around it & then twisted more of it to create a plait design. This was then mounted on some Bumblebee cardstock. Another card ready to attach a sentiment.
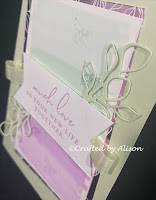
Purples were the focus of the send Split Card Texture card. This time though I used the background behind a piece of Basic White, diecut with the second die from the die set with the checkered pattern. This was then mounted on a Gorgeous Grape card base.
That's the last of my creations but I thought I'd show you the original card that sparked the idea of creating more backgrounds with this technique.
This is the card that was created during the creativity session held by Stampin' Up® in July 2022 & was featured in my July 17th blog post.
That brings us to the end of another Mid Week blog. I hope you've enjoyed learning how to create easy background pieces using Stampin' Blend alcohol markers. I'd love to see any creations you make using this technique so please feel free to head over to my FaceBook page, craftedbyalison, & post a pic. My next blog is on Sunday & features a card made using another Tic Tac Toe challenge. Next week's Mid Week blog is all about casing the Stampin' Up® catalogues. I hope you can come back for both of them.
Thanks so much for stopping by, I hope you have time this week to do some creating of your own. Til next time, take care & keep creating. XX Alison


Comments
Post a Comment