Hello & welcome to my blog,
My name is Alison & I am an independent Stampin' Up® demonstrator in Melbourne, Australia. I love creating cards & gifts for my loved ones & this blog will show you how to create something special for those you love. Today's blog shows you a fun fold that holds a gift card inside - perfect for birthdays, Christmas, weddings or any occasion when you want to give a little gift. I was inspired by a post I saw by a post I saw by a French demonstrator, Ludi' Bulles & Creations.

I've created two different versions, one portrait & one landscape & one for Christmas & one for a male.
Here are the cutting dimensions for the Christmas card. I used the Trimming the Tree stamp set & Tree Trimming dies for the images & sentiment & the Deckled Rectangle dies for the Very Vanilla pieces.

Main cardstock (Pretty Peacock) -14.85 x 21cm for the main card base & 7 x 21cm for the inner card base.
Score the main card at 10.5cm & then cut diagonally from the score line to the right corner. Fold & burnish.
Score the inner card at 10.5cm, fold & burnish.
Contrast cardstock (Very Vanilla) - 2 pieces 7 x 10.5cm, diecut with the middle sized Deckled Rectangles dies. 1 piece 7 x 9cm for stamping.
DSP cutting dimensions using Brightly Gleaming DSP
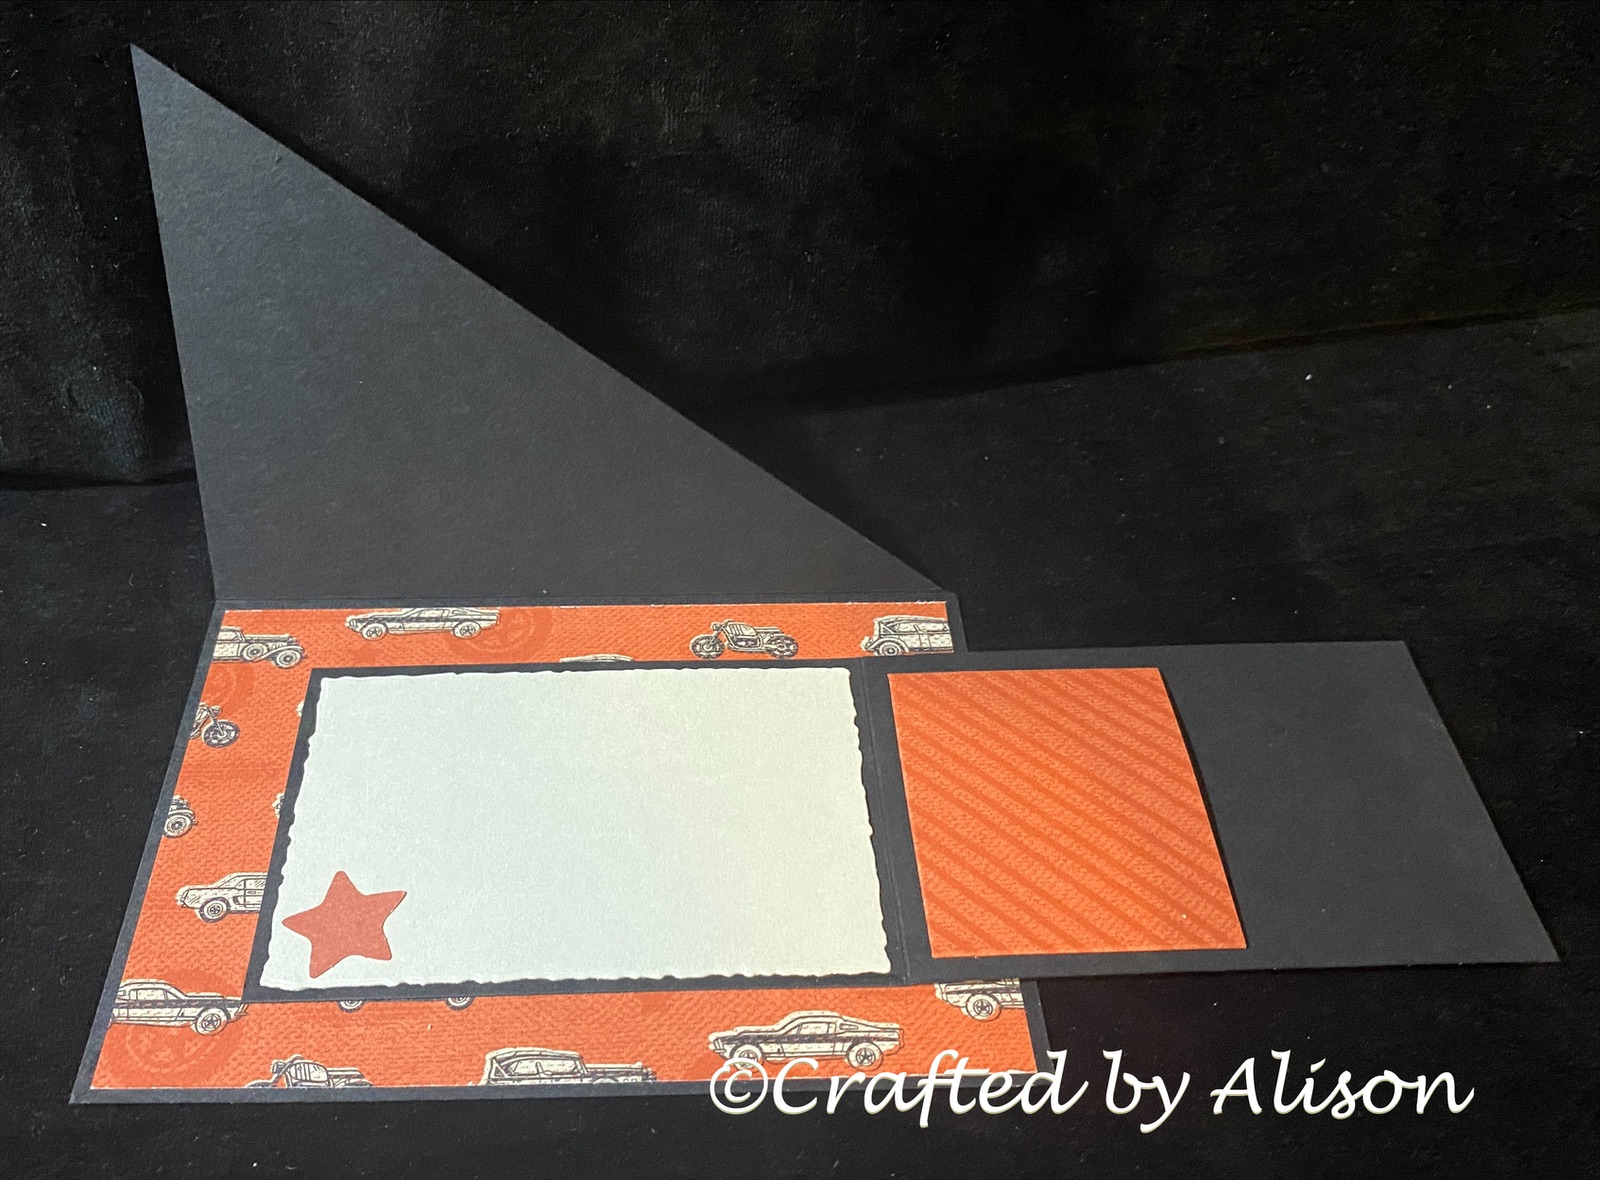
Design 1 - 10 x 14.3cm & 6.8 x 5.5cm. Score the smaller piece .4cm on the 2 shorter edges & .5cm on one long edge. Trim a diagonal piece from the 2 corners that cross. Fold & burnish. This will form the gift card holder.
Design 2 - 2 pieces 10 x 14.3cm cut diagonally. #note: only 2 of the 4 diagonals will be used in this card.
Adhere the 10 x 14.3cm piece to the inside of the card.
Adhere 2 of the diagonal panels to the front & inside front of the card.
Adhere the smaller card centrally to the inside of the card.
Stamp small images onto the two diecut pieces. I chose a small star from the Trees for Sale stamp set & inked them up with Stampin' Blends.
On the spare contrast cardstock I stamped a large tree image in Mossy Meadow & Pear Pizzazz & diecut it out.
Attach the Very Vanilla pieces to the front & inside of the smaller card.
Place a small amount of glue on the flaps of the gift card holder & adhere it towards the score line of the opened smaller card, as shown.
I then attached the Tree to the front of the inside card & embellished it with Garden Gems & a Gold shimmer ribbon bow.
For the sentiment I used a scrap of Very Vanilla & Pretty Peacock & cut the ends diagonally before adhering it to the front of the tree.
Here's the finished card.
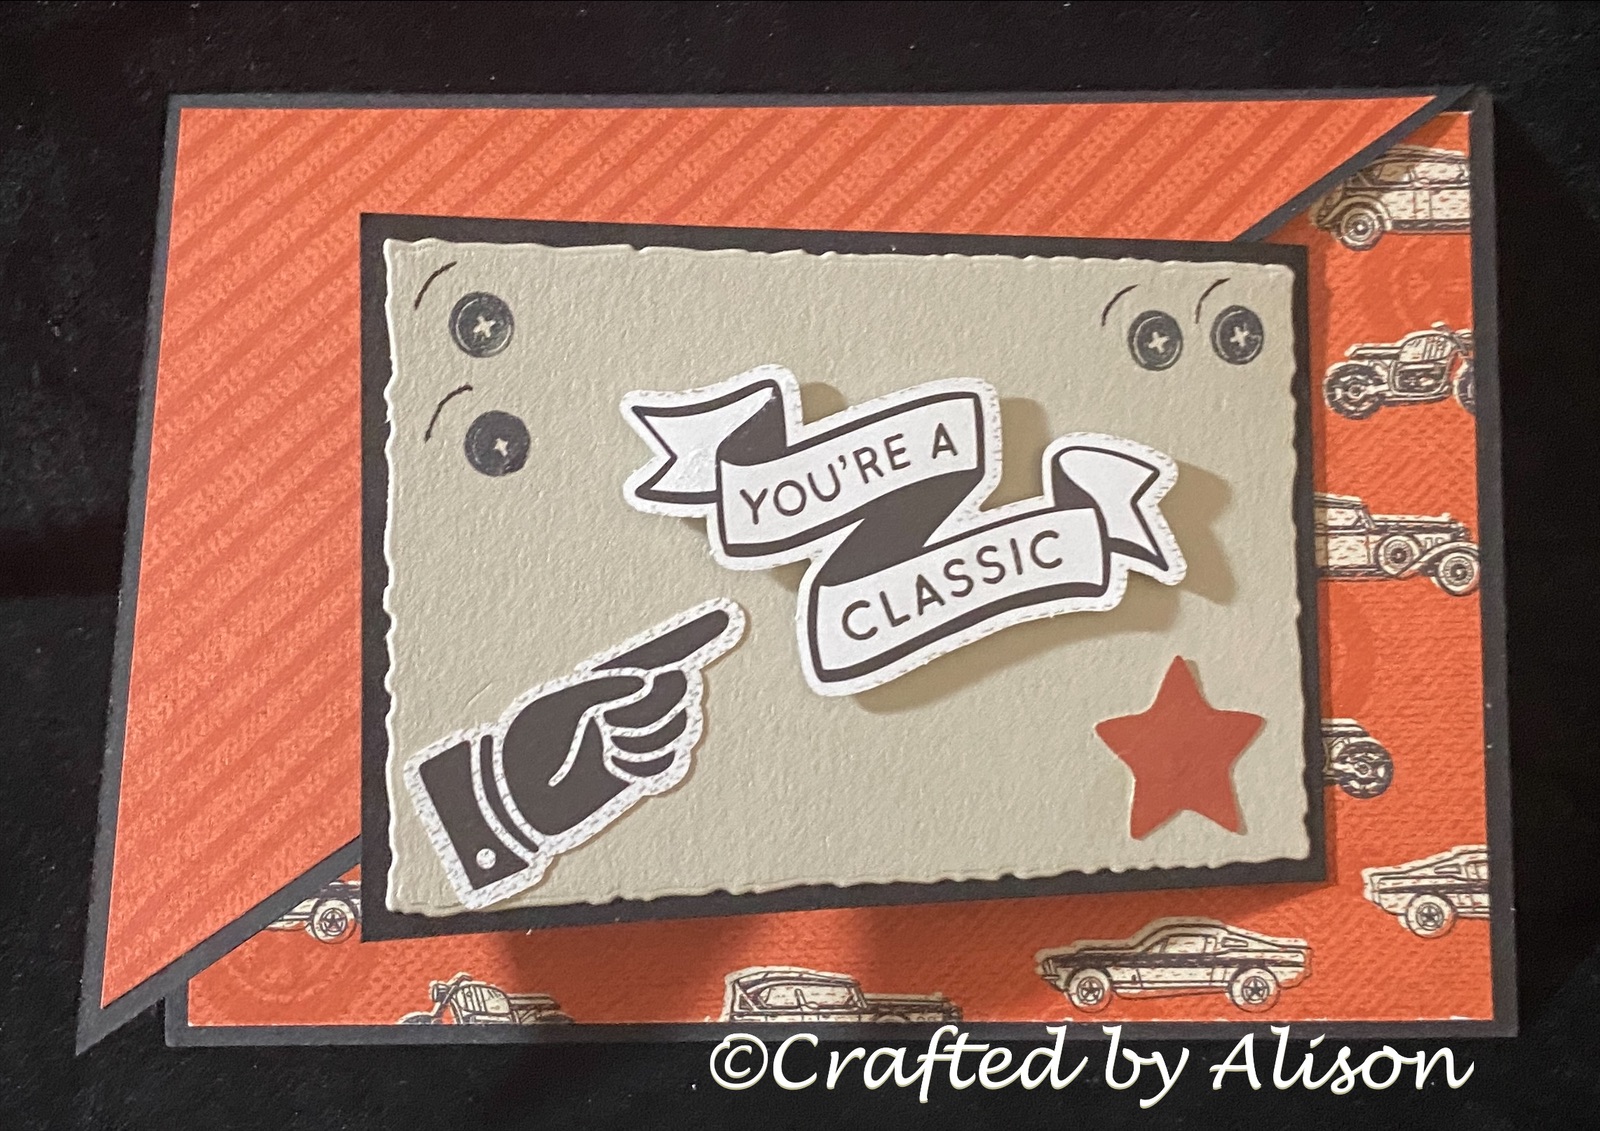
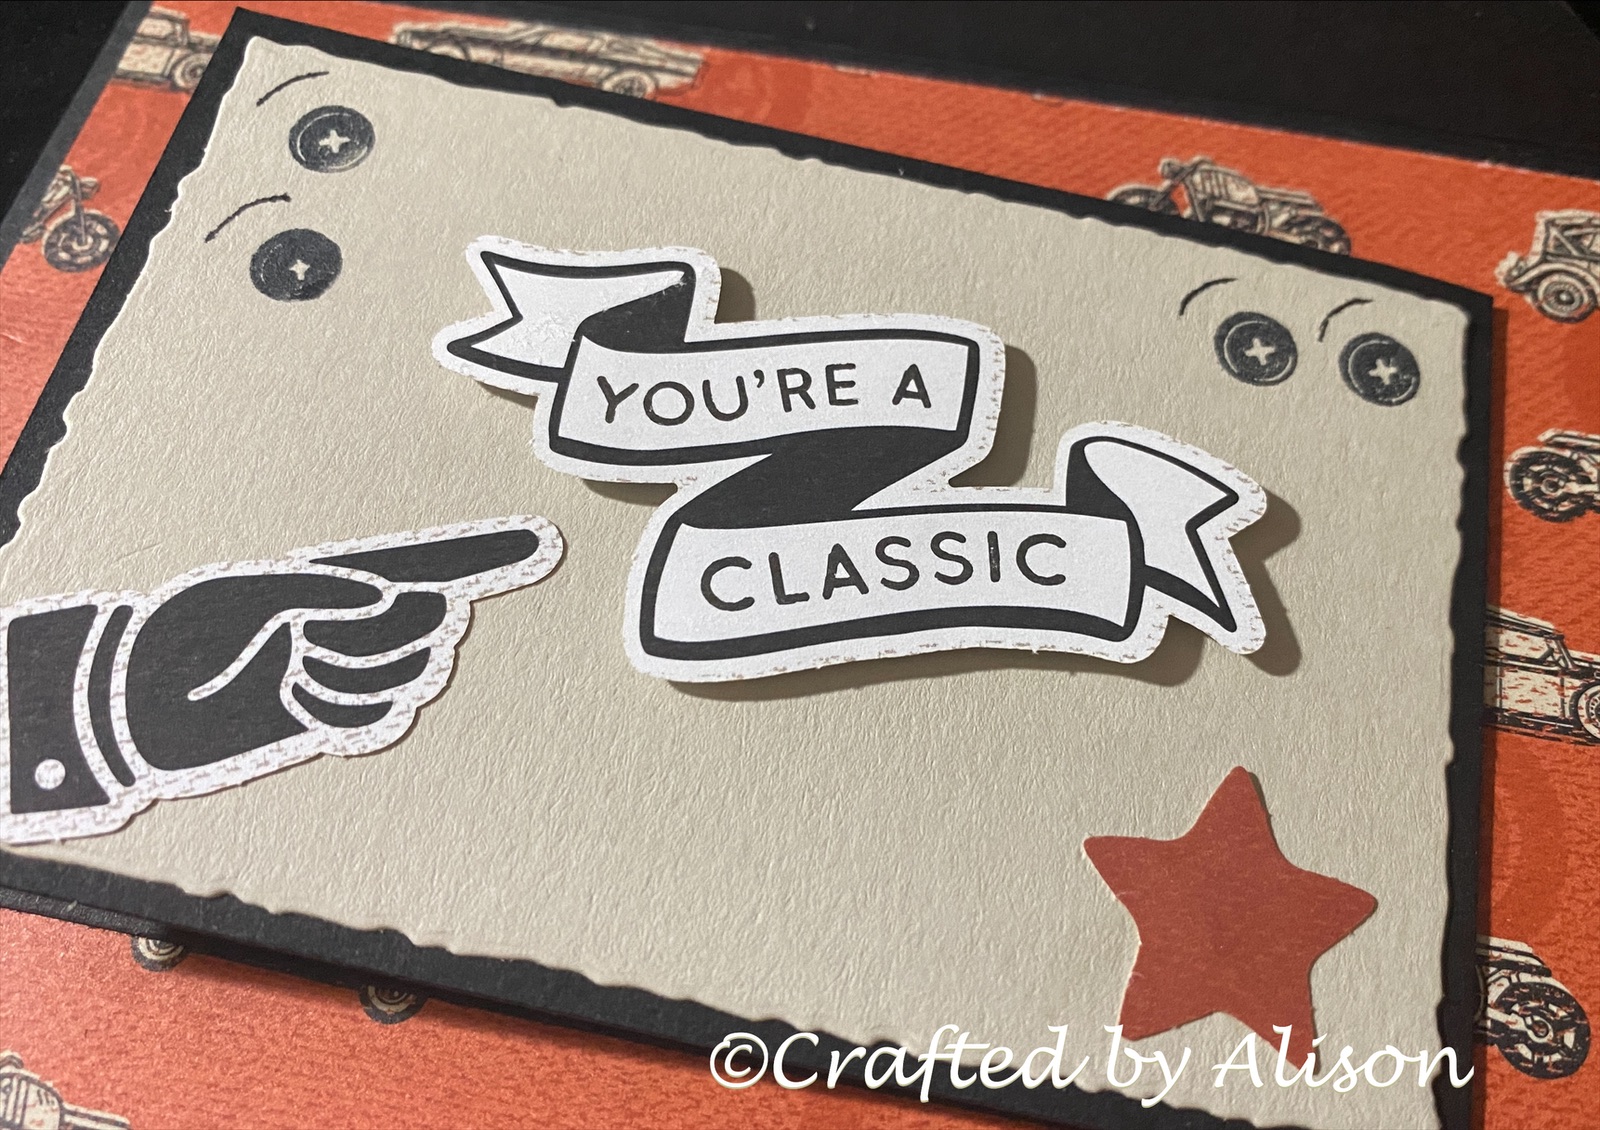
For the second card I wanted something that could be used for birthdays or other celebrations & thought a male card would be perfect. I don't know about you but I always find shopping for some guys is harder than shopping for the ladies so I often give a gift card. That way they can choose something that's just right. So, I chose the He's the Man DSP & He's All That stamp set to create a landscape fold card. The cutting dimensions are the same but the card is just turned on it's side.

The colours I chose for this card co-ordinate with the colours of the DSP. They are Basic Black & Sahara Sand. All of the embellishments come from the DSP diecut sheet.
As you can see, this fun fold is easy to adapt for any occasion & simple to create.
That's all I have for you for this post. Thanks for stopping by. I hope you've enjoyed this fun fold. My next blog will be on Sunday & features a technique shown in the May '22 - April '23 Annual Catalogue - stamping on Vellum using the Fresh Cut Flowers stamp set. Next week's Mid Week blog shows you how to use the Baby Wipe technique to create unique & stunning stamped cardstock. I hope you can join me for both of those.
Til next time, take care & keep creating. XX Alison


Comments
Post a Comment