Hello & welcome to my blog,
My name is Alison & I am an independent Stampin' Up® demonstrator in Melbourne, Australia. I love creating cards & gifts for my loved ones & this blog will show you how to create something special for those you love. Today's blog shows you how to create a faux tile stamped image. But before I get started, let me first apologise for being 1 day late with this post. This time of the year is always crazy as I'm sure it is for many people and this week I've had 2 large orders for cards & gift wrapping that I needed to finish off which meant my time for finishing off this card for the blog was very limited. I'm just about finished with all the items but thank you for understanding. So onto the focus card.......
This is such an easy technique but looks so impressive. I hope you love it!
So, to get started, I used a 14cm x 14cm kraft card base with a Starry Sky matte measuring 13.6cm x 13.6cm plus a Basic White matte measuring 13.2cm x 13.2cm which will be the faux tile.
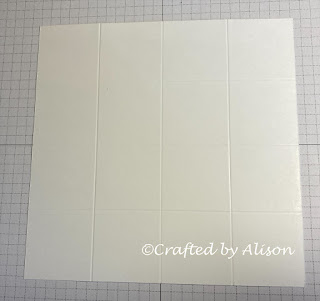
Next I measured 3 equal sections & scored at 3.3cm, 6.6cm & 9.9cm, turned 90 degrees & repeated the score lines. This gives you what appears to be a 4 x 4 set of tiles.
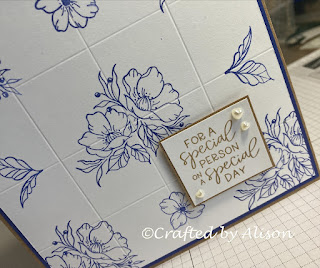
With Starry Sky ink & the Framed Florets stamp set I then stamped the bouquet image in the centre plus a partial image in the 4 corners.

To add a little more detail I added 2 small flowers & 2 leaves in between the corner images. For both of these stampings I placed a scrap of paper underneath to protect the workspace.

This image was then matte with Starry Sky & attached to the card base.
For the sentiment I used Crumb Cake ink & backed it with kraft card but only left a narrow edge around it. I then popped on some Heart Pearls to match the wording of the sentiment & attached it to the base with dimensionals.
I this picture you can see the score lines behind the images. I also stamped a small image inside the card on Basic White & again matted it with Starry Sky.
That's the entire steps for making this card! I told you it was easy. 😁 This card reminds me of Blue Delft tiles & as you may know, blue is my favourite colour so creating this card was quite easy for me. After making this card in a really short amount of time I think I know what will be my go to 'quick make' card when I need some. This technique would also look great with larger images in the centre with just a few tiny matching details in the corners. If you decide to try this technique I'd love to see what you come up with so please feel free to pop a pic on my FaceBook page at craftebyalison.
Well, that's it for another Mid Week post. Thanks for popping in. I hope you've enjoyed this easy card. My next blog will be on Sunday & features a brand new stamp set that I've only had a week - Lighthouse Point. It's a lovely set with so many possibilities. Next week's Mid Week blog will show you how to use the Stamparatus when you want to create a number of the same cards easily. I hope you can join me for both of them.
That's all for now. Til next time, take care & keep crafting!
XX Alison


Comments
Post a Comment