Hello, welcome to my blog,
My name is Alison & I am an independent Stampin' Up® demonstrator in Melbourne, Australia. I love creating cards & gifts for my loved ones & this blog will show you how to create something special for those you love. If this is your first time here, thanks for visiting, I hope you enjoy what I have to share with you. If you're a returning visitor, thank you so much for supporting me! 😍
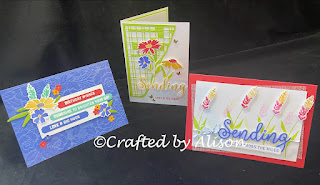
Today's blog features a gorgeous stamp & die bundle called Sending Smiles. I shared a card I CASEd from the 2022-23 catalogue in my mid week blog on Wednesday & today's blog gives you more detail on how I created that card plus 2 other cards I CASEd using the same bundle.
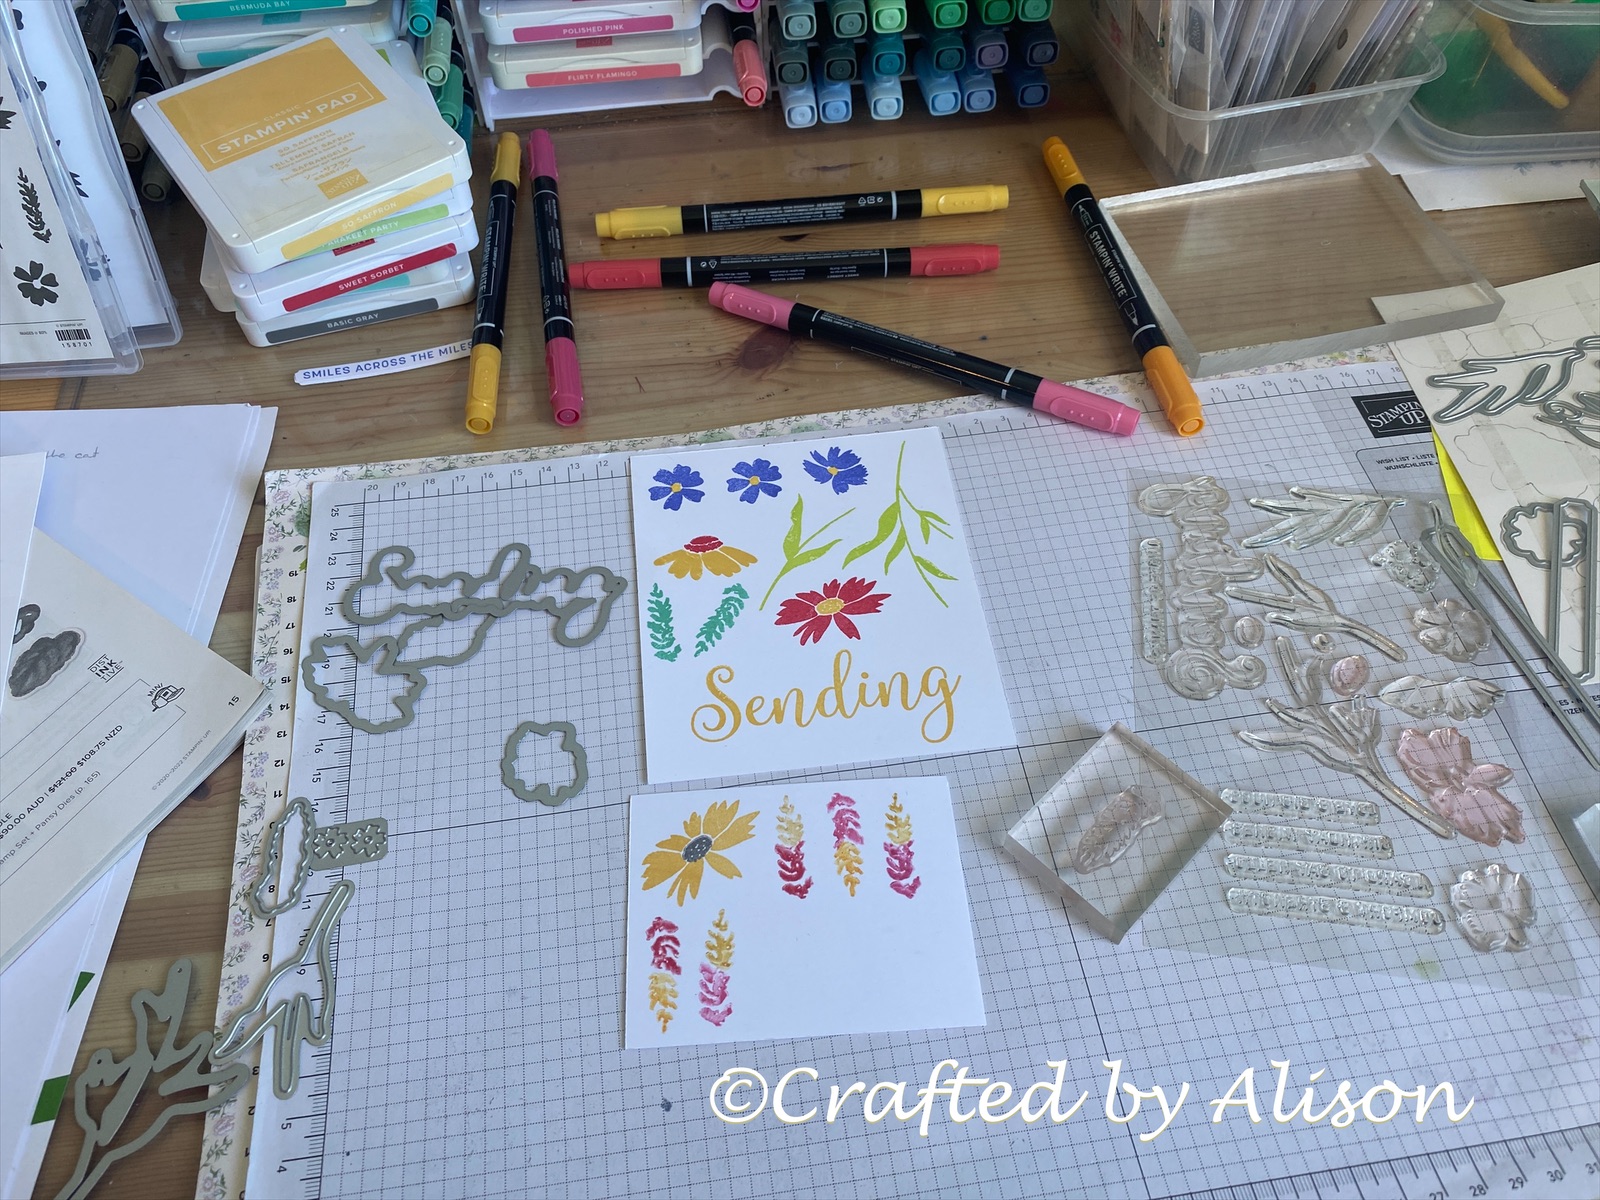
As there was a bit of stamping & diecutting involved in creating all three I decided to stamp as much as possible at the one time then diecut them to save a bit of time. Here's a pic of the state of my desk during this process! LOL
Now I'll walk you through each card, starting with the Orchid Oasis card on the left.
This card is similar to the card in the Annual Catalogue but I tweaked it to 'make it my own'. It starts with an Orchid Oasis card base. To achieve the whitewash finish I inked up the de-bossed (if that's even a word) or cutaway side of the Pretty Flowers embossing folder.
I tried applying the ink to both sides but preferred the finish that left the whitewash embossed & the image raised.
On scraps of Sweet Sorbet, Coastal Cabana & Orchid Oasis I heat embossed 3 different sentiments & diecut them with the label shapes from Sending dies. I also used Sweet Sorbet, Mango Melody, Orchid Oasis & Pear Pizzazz scraps for the small flowers & leaves. Some of these were added to the sentiment strip along with the larger flowers while a few were scattered across the card.
I added a layer of Orchid Oasis cardstock to the inside front of the card as I preferred the extra strength to hold the card open then stamped the inside of the card & envelope & it was finished.
The second card again was tweaked a little as the original card has white lattice behind the flowers but I don't have that die so decided instead to use the Split Card Textures dies & Parakeet Party cardstock instead. I kept a few of the diecut pieces in the lattice as I really like how it looks. This was glued down with liquid glue but you could also use Adhesive sheets.
The flowers are stamped in Orchid Oasis, Sweet Sorbet & So Saffron, the leaves in Parakeet Party & the diecut sentiment is also in So Saffron. I stamped a smaller greeting directly onto the card using Sweet Sorbet then raised the flowers & 'Sending' on dimensionals over the lattice & blank area. A few of the super cute Brass Butterflies were added as a finishing touch & inside the card & the envelope were also decorated.
And so for the final card. This one stays closest to the original card in the catalogue. Only the pattern on the vellum matte, direction of the flowers & the number of them is different. It's such a pretty card & I love the simple layout of it.
On a Sweet Sorbet card base there is a matte of Vellum Layering Designs which gives it a subtle backing to start the card. I stamped the greenery first then a second time directly onto a Basic White matte. The flowers, which remind me of lavender blooms, I created by using a variety of pink & yellow Stampin' Write markers directly onto the stamp. I stamped them firstly onto the Basic White piece that all my stamping was done on then a second time onto the card matte. The first stamping was then diecut & raised on dimensionals.


'Sending' was diecut from Orchid Oasis cardstock. I placed a piece of the Adhesive sheets behind it first to make it a little easier to place. I then blended some Orchid Oasis on another piece of Basic White & diecut it with the shadow die. This gives it a lovely hue behind the word. Another sentiment was stamped in Orchid Oasis & diecut with the label shape. I wrapped a piece of 2022-23 In Colour twine around the card then raised the sentiments over that. The inside has some stamping as was the envelope.
Surprising, apart from the Brass Butterflies, there's no bling on these cards! Don't worry though, I'm sure you'll some some again real soon! LOL.
These cards have all used the sentiments in the stamp set but with the 'Sending' diecut you can add any sentiment you like from other stamp sets & create totally unique cards for any occasion. It's a very versatile set.
Well, that's it for another week. Thanks so much for stopping by. If you would like to order any of the supplies I used today you can head over to my
Stampin' Up® shop using the links below. Don't worry if you don't have the supplies that I used today. Just swap out the items for whatever you have in your stash.
I hope you have enjoyed my creations today & can join me again on Wednesday when I have a Colour Challenge for you. Then next Sunday's blog which will feature the beautiful Friends are like Seashells stamp set & co-ordinating dies & embossing folder. I hope you can join me for both of them.
Don't forget that new mini catalogue went live on the 5th January & coincides with the release of the latest Sale-a-bration promotion. Both are full of gorgeous new products including a whopping 48 sheets of DSP in one of the free packs in the Sale-a-bration catalogue!
If you would like to purchase any of my creations that I feature in my blogs they can be found in my FaceBook shop at craftedbyalison or you can or order something unique.
If you would like me to send you a Mini catalogue or the Annual catalogue then please message me via my FaceBook page, Crafted by Alison or send me an email at craftedbyalison@gmail.com.
Thanks for stopping by, til next time, take care & keep creating! XX Alison


Comments
Post a Comment