

Mid Week blog #70 'Z' Fun fold
Hello & welcome to my blog,
My name is Alison & I am an independent Stampin' Up® demonstrator in Melbourne, Australia. I love creating cards & gifts for my loved ones & this blog will show you how to create something special for those you love. I blog twice a week, once on a Sunday where I mainly showcase a stamp set or dies & sometimes special DSP. My second blog is mid week on a Wednesday where I look at techniques, colour challenges, card sketches, fun folds, tools & equipment & ways to make or improve your projects. That's what this blog is about. Today I will be sharing a lovely fun fold with you. This was created for a card swap I'm participating in with my Stampin' Up team. It's a variation of a Z fold & I'm so happy with how the cards turned out & wanted to share them with you.

- 2 pieces of main colour cardstock measuring 14.85 x 10.5cm
- 3 pieces of contrasting cardstock measuring 14.3 x 10cm
- 1 piece of DSP measuring 13.8 x 9.5cm
- 1 piece of Basic White cardstock measuring 29.7 x 9.5cm, scored at 9.9 & 19.8cm
- Basic White cardstock for stamping
- Sending Smiles stamp set
- Sending dies
- Sentiment of your choice
- Something Fancy dies
- Stampin' Blends/Write Markers in colours of your choice
- Woven metallic ribbon
- Glossy dots or choice of embellishments
To build up this card I started with the front & base of the card.
Adhere the first contrast matte to the base main cardstock piece.
Adhere the DSP to the second contrast matte (for the front) then wrap the ribbon around this before attaching to the card front. Turn over & adhere the remaining contrast cardstock to the back of the front piece.
Stamp the scored Basic White cardstock on the two inside folds only. Two sides of this will be adhered to the base & reverse of the front so won't be seen if you stamp on them. The reverse of this piece can be stamped on if you like, bearing in mind that it will only be seen if the recipient turns it over.
Stamp the sentiment & images on the Basic White set aside for stamping & diecut using the Sending dies for the flowers & the Something Fancy dies for the sentiment tag.
Apply adhesive to the bottom of the Z fold Basic White piece & centre it on the base card. Hold down until glue has caught.
Fold the Z fold & apply adhesive to the top. Carefully hold down before placing the top of the card down onto it. Hold in place until glue has caught.
Attach the images to the sentiment tag & adhere with dimensionals to the card front.
Add some bling and you're done! Here are the 10 cards I made for the swap.
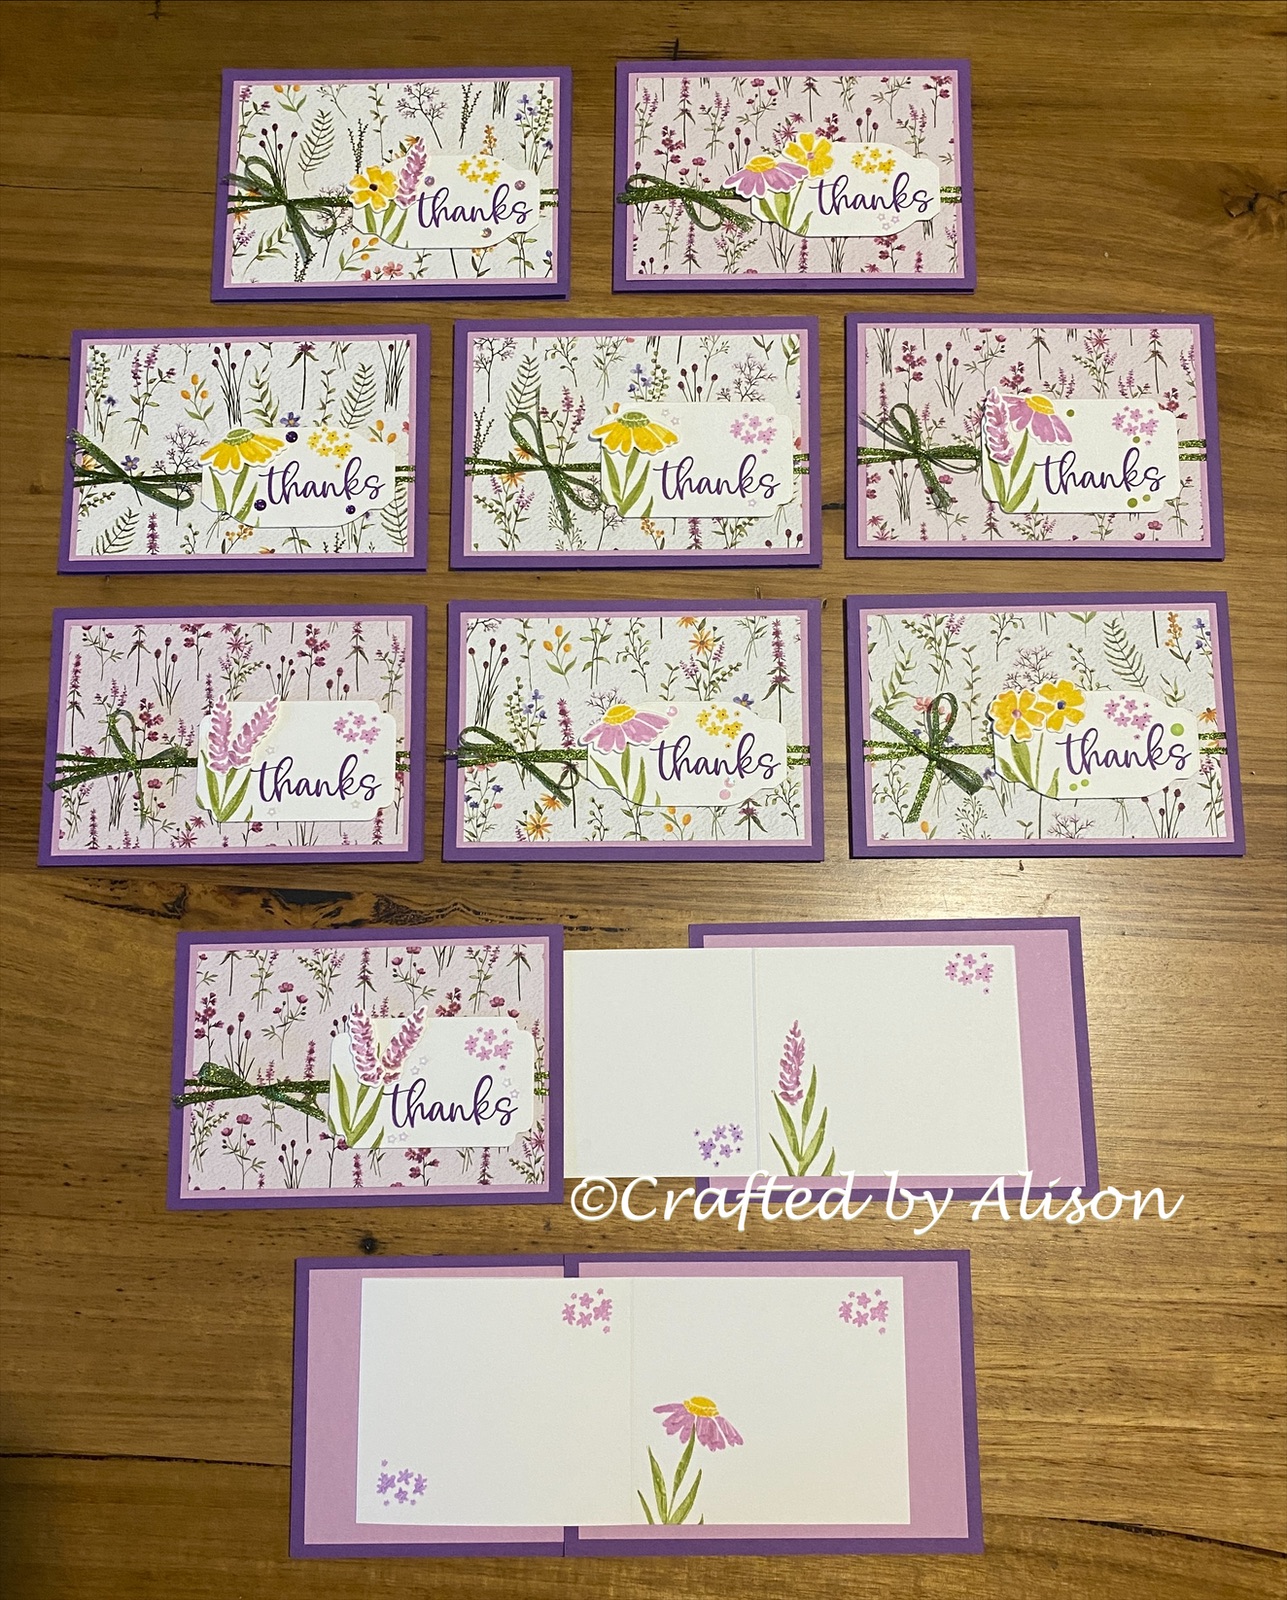
They are all basically the same but have slight differences with the flowers, embellishments or shape of the label.


Comments
Post a Comment