Hello & welcome to my blog,
My name is Alison & I am an independent Stampin' Up® demonstrator in Melbourne, Australia. I love creating cards & gifts for my loved ones & this blog will show you how to create something special for those you love. I blog twice a week, once on a Sunday where I mainly showcase a stamp set or dies & sometimes special DSP. My second blog is mid week on a Wednesday where I look at techniques, colour challenges, card sketches, fun folds, tools & equipment & ways to make or improve your projects. That's what this blog is about.
In last week's mid week blog I shared my first time of creating with embossing paste. This week I am experimenting with the paste by colouring it. This is a great way to personalise the paste to whatever colour you need for your projects & is such an easy process. Here's how I created my very own coloured paste...
I started with some cardstock, a card stencil created with scrap cardstock & the Gorgeous Garden dies. Of course there was also some embossing paste & I added some re-inkers & my palette knives.
With some embossing paste on my Silicone Craft Sheet I added 2 drops of Granny Apple Green re-inker. Not happy with the colour, I added 2 drops of Shy Shamrock.
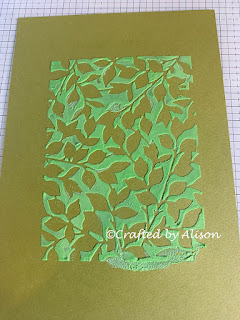
Mixing it thoroughly gave me a lovely green paste, ready to spread over the stencil & cardstock.
After carefully removing the stencil I had this...
While I liked the raised effect I was a little disappointed that some of the paste had smeared. So, I decided to try some different colours, without the stencil...
I started with some Peach Pie & smeared it randomly on some Basic White cardstock.
Over the top of that layer I smeared some Petunia Pop coloured paste but left some areas of Peach Pie peeking through. I now had a watercolour type of effect but with embossing paste.
I added a different stencil over the top. I had originally planned to use it in a similar way as the green leafy base but decided it would look lovely over a coloured base. I trimmed down the white area to fit onto a Petunia Pop card base & loved how it popped with vibrant colour.
To finish off the card I wanted a simple sentiment & chose 'for you' from the Layering Leaves stamp set. i diecut the sentiment out using the Everyday Essentials dies then added a Peach Pie circle behind it. I wanted a little something else but decided that bling or ribbon would disappear on the busy background so I cut a thin strip of Petunia Pop & used another die from the Everyday Essentials set to create an interest point behind the sentiment. 2 small 2024-26 In Colour Shimmer Gems finished it off.
Here is the finished card & I LOVE it!
I really had so much fun working with this paste. It's definitely therapeutic & allows for unlimited creativiy. I hope you'll give it a try yourself.
That's all I have for you this week. My next blog is on Sunday & I will have my final instalment on using the stunning Citrus Blooms stamps & dies plus the Mediterranean Blooms DSP.
In next week's mid week blog I will be creating a card with DSP but using a split method to mix it up a little. I hope you can join me for both of them.
Til next week, take care & keep creating. XX Alison


Beautiful card. I love the white stencil over the Peach Pie and Petunia Pop. It's so bright and happy!
ReplyDelete