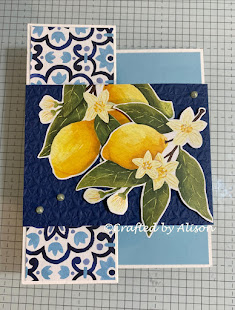
Mid week blog #123 - V-W fun fold
Hello & welcome to my blog,
My name is Alison & I am an independent Stampin' Up® demonstrator in Melbourne, Australia. I love creating cards & gifts for my loved ones & this blog will show you how to create something special for those you love. I blog twice a week, once on a Sunday where I mainly showcase a stamp set or dies & sometimes special DSP. My second blog is mid week on a Wednesday where I look at techniques, colour challenges, card sketches, fun folds, tools & equipment & ways to make or improve your projects. That's what this blog is about.
For those of you who have visited my blog before, you know that I am a bit partial to a fun fold! This week I have another fun funfold for you that is similar to other folds I have done in the past. It's a quick & easy fold that allows you to add a little bit of WOW to a regular card with just an extra score line & the addition of another piece of decorated cardstock.
This card was so easy to make.
First you start with a regular 21cm x 14.85cm base & score it in half at 10.5cm as usual but then you add another score line at 15.75cm. Flip it & fold the score lines as a Mountain fold & a Valley fold. Two strips of Mediterranean Blooms DSP were attached to the two front panels & a piece of Balmy Blue was attached to the inside of the card.
The larger section of this band was embossed with one of the Basics 3D embossing folders then decorated with some more of the DSP.
Next step is attaching the panel to your card. To achieve a perfect fit you align the edges of the panel to the card base so that they are flush with the edges of the card. I find the best way to achieve flush edges is to adhere some glue to the left side of the embossed band & some to the right side of the 1st front panel fold, place the two together & hold down until set. Add glue to the bottom panel of the band & with the band facing up, close the back section of the card over, onto the glued area. The folds should automatically allow you to only fold it in a way that aligns it perfectly.


Comments
Post a Comment