Midweek blog #127 - Colouring using Stampin' Blends®
Hello & welcome to my blog,
My name is Alison & I am an independent Stampin' Up® demonstrator in Melbourne, Australia. I love creating cards & gifts for my loved ones & this blog will show you how to create something special for those you love. I blog twice a week, once on a Sunday where I mainly showcase a stamp set or dies & sometimes special DSP. My second blog is mid week on a Wednesday where I look at techniques, colour challenges, card sketches, fun folds, tools & equipment & ways to make or improve your projects. That's what this blog is about.
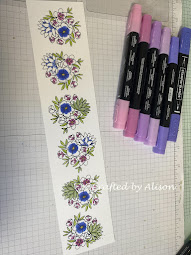
This week I am sharing some colouring tips with you. Stampin' Up® have a beautiful stamp set called Country Flowers that has lots of whimsical pieces that are perfect for colouring in. I am creating a series of posts based around this stamp set & it's matching dies but to do that I first need to stamp & colour.
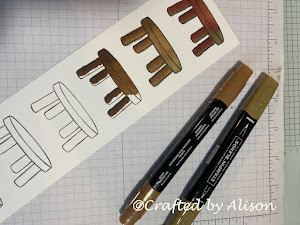
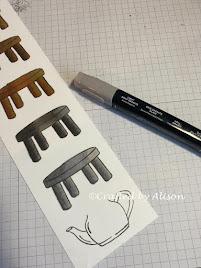
I used all different shades of Stampin' Blends® except for the insides of some of the flowers which is a Daffodil Delight Stampin' Write marker®. As there is a lot of images to stamp I decided to use up some of the leftover strips of Basic White cardstock from previous projects. I stamped multiple images of each stamp in a variety of colours then set to work colouring.
Firstly, a warning that I went a bit crazy with photographing the process. I used 6 different stamps & did a few different colour ways to show you how to create different effects. As there are lots of photos I'll try to give a brief description for each of them but some will be in groups.
The first is the stamps & dies with the images already stamped.
First I stamped the leaves in in Tuxedo Black.
They are coloured with Dark Granny Apple Green for the highlights & Light Granny for the whole image. I also decided to colour two more on scraps with Light & Dark Lemon Lime Twist.
Next was the milk pail image. I stamped 6 of them in Copper Clay, Pecan Pie, Crushed Curry, Pebbled Path, Smoky Slate & Basic Gray.
WOW, that was epic! but I had so much fun experimenting with all of the different colour combinations.
That's it for this card technique. I hope you enjoyed learning a little more about colouring with Stampin' Blends® If you decide to try this technique I would love to see what you make so please feel free to pop over to my Facebook page at craftedbyalison & post a pic.


Comments
Post a Comment